To perform a BioVerify real-time biometric identity verification you will first need to check that your firm has both Centrix driver's license and passport checks enabled. If your firm profile does not have these features activated please complete the application forms located on the following Electronic Identity Verification page
We also recommend that you merge any duplicate contacts before undertaking a biometric identity verification check. Please see our support article Merging Duplicate Contacts for guidance on how to do this.
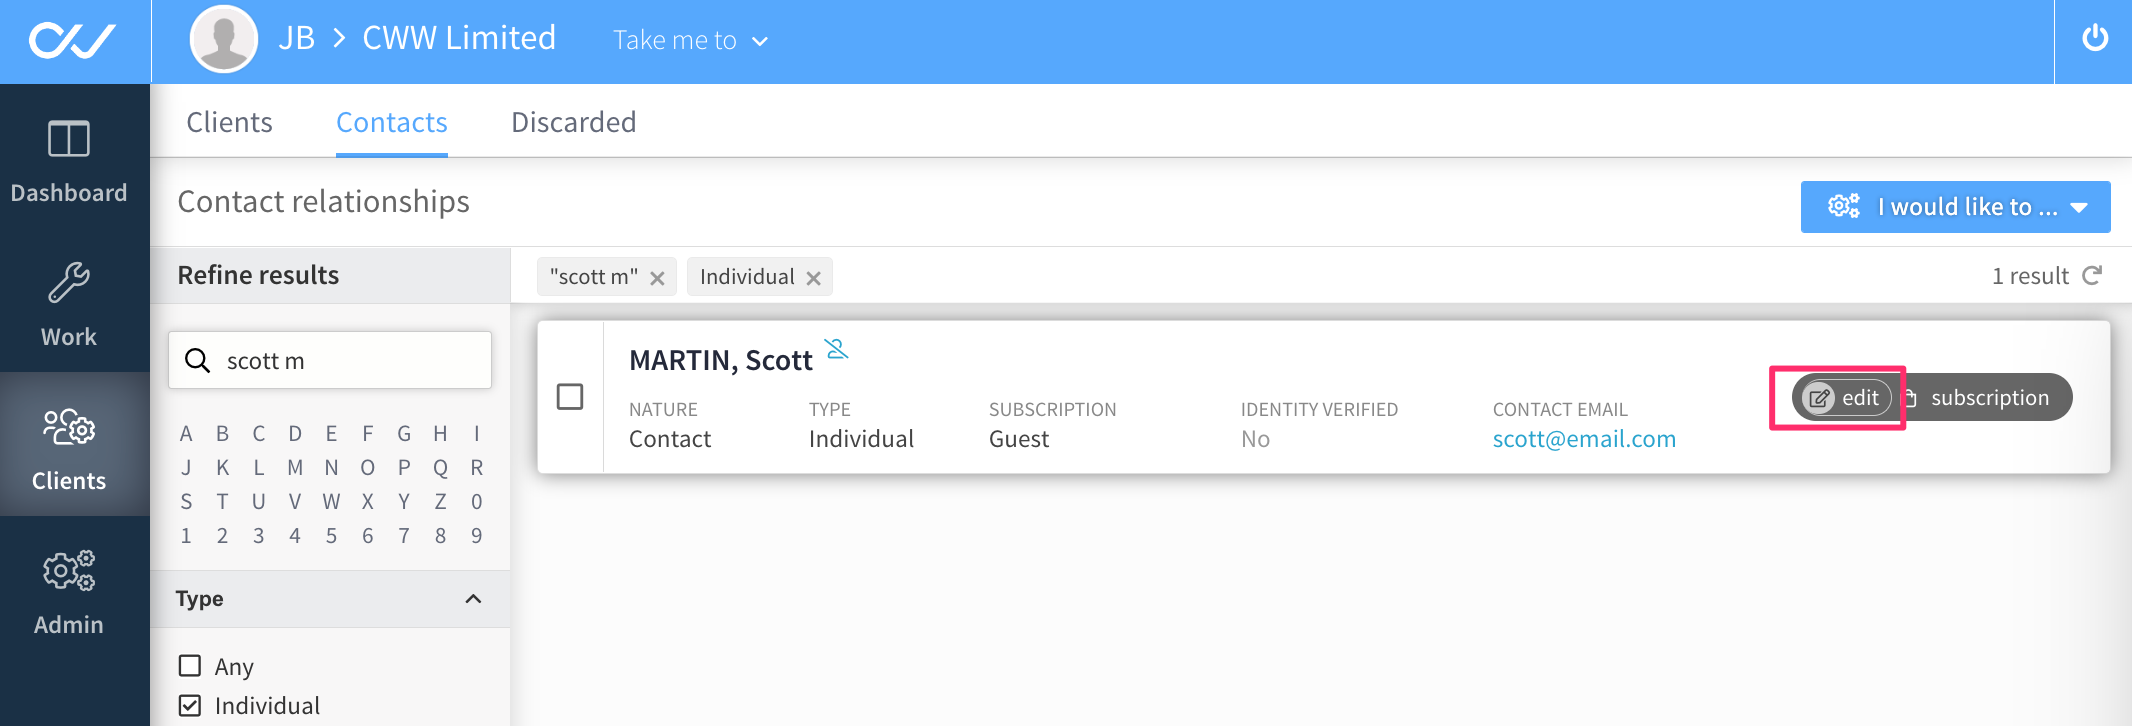
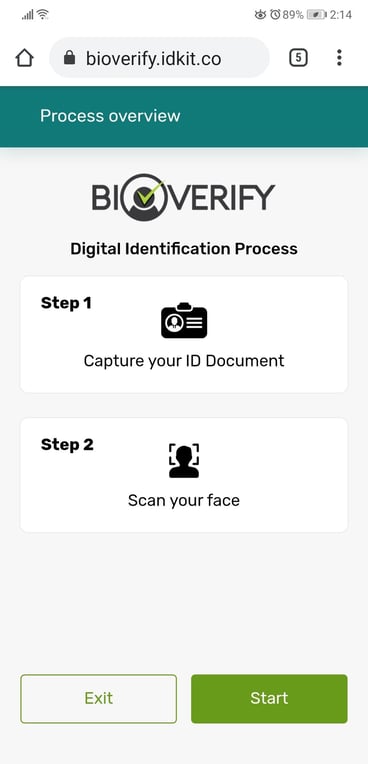
1. Navigate to Clients>Contacts and search for the individual and select edit.
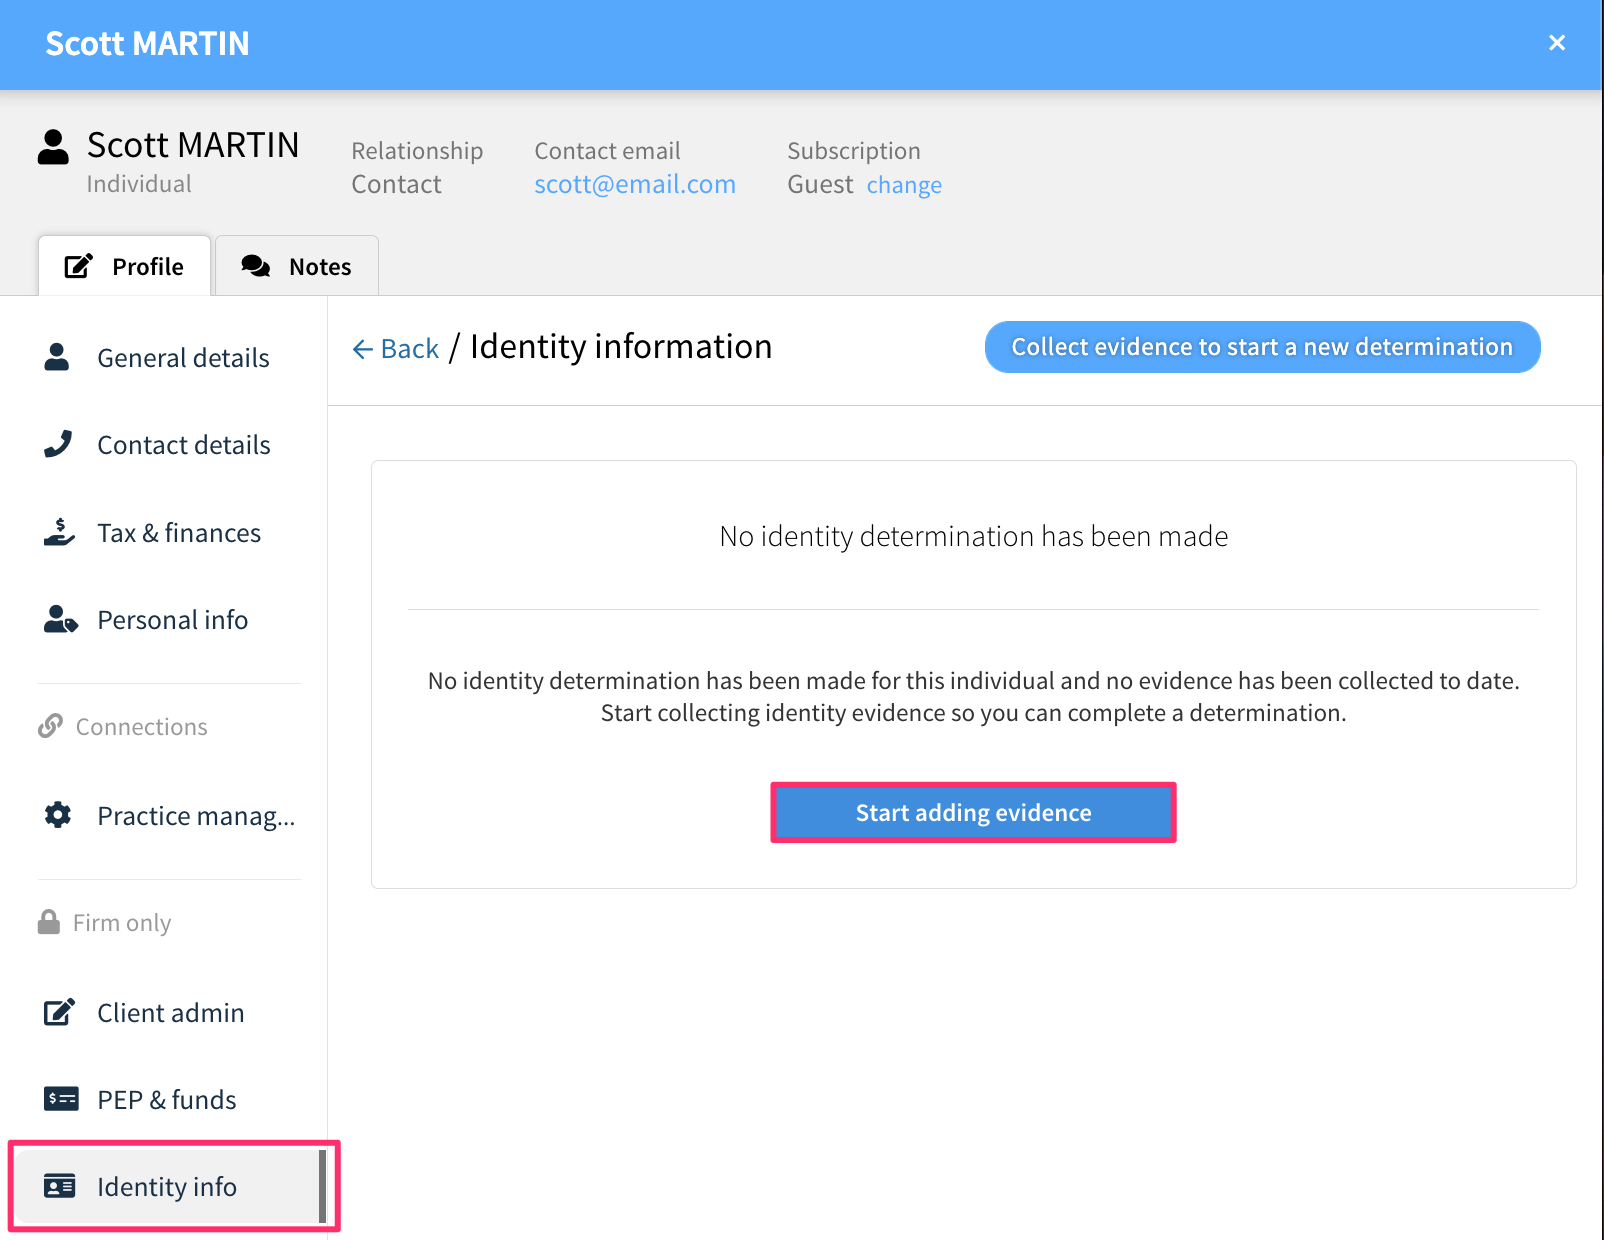
2. Click on Identity info under 'Firm only', and select 'Start adding evidence'.
3. Under the 'add electronic evidence' section, click on BioVerify real-time biometric verification 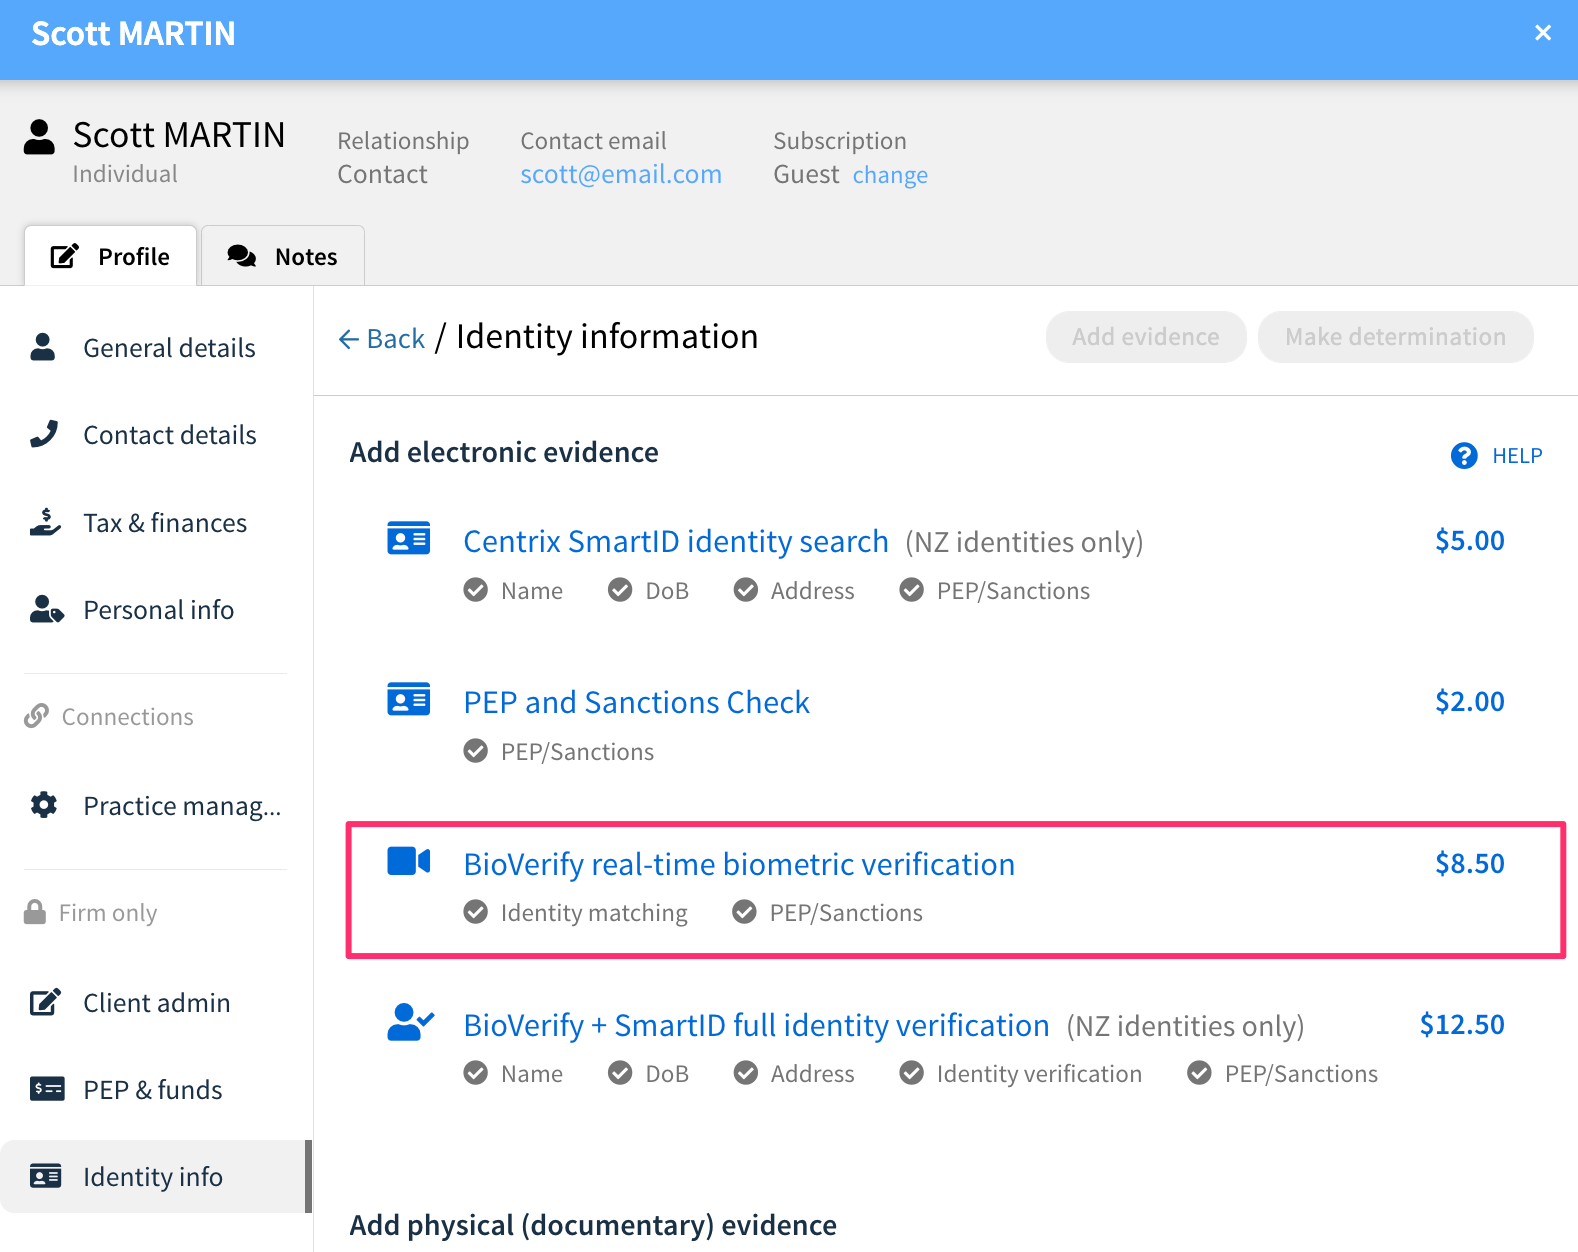
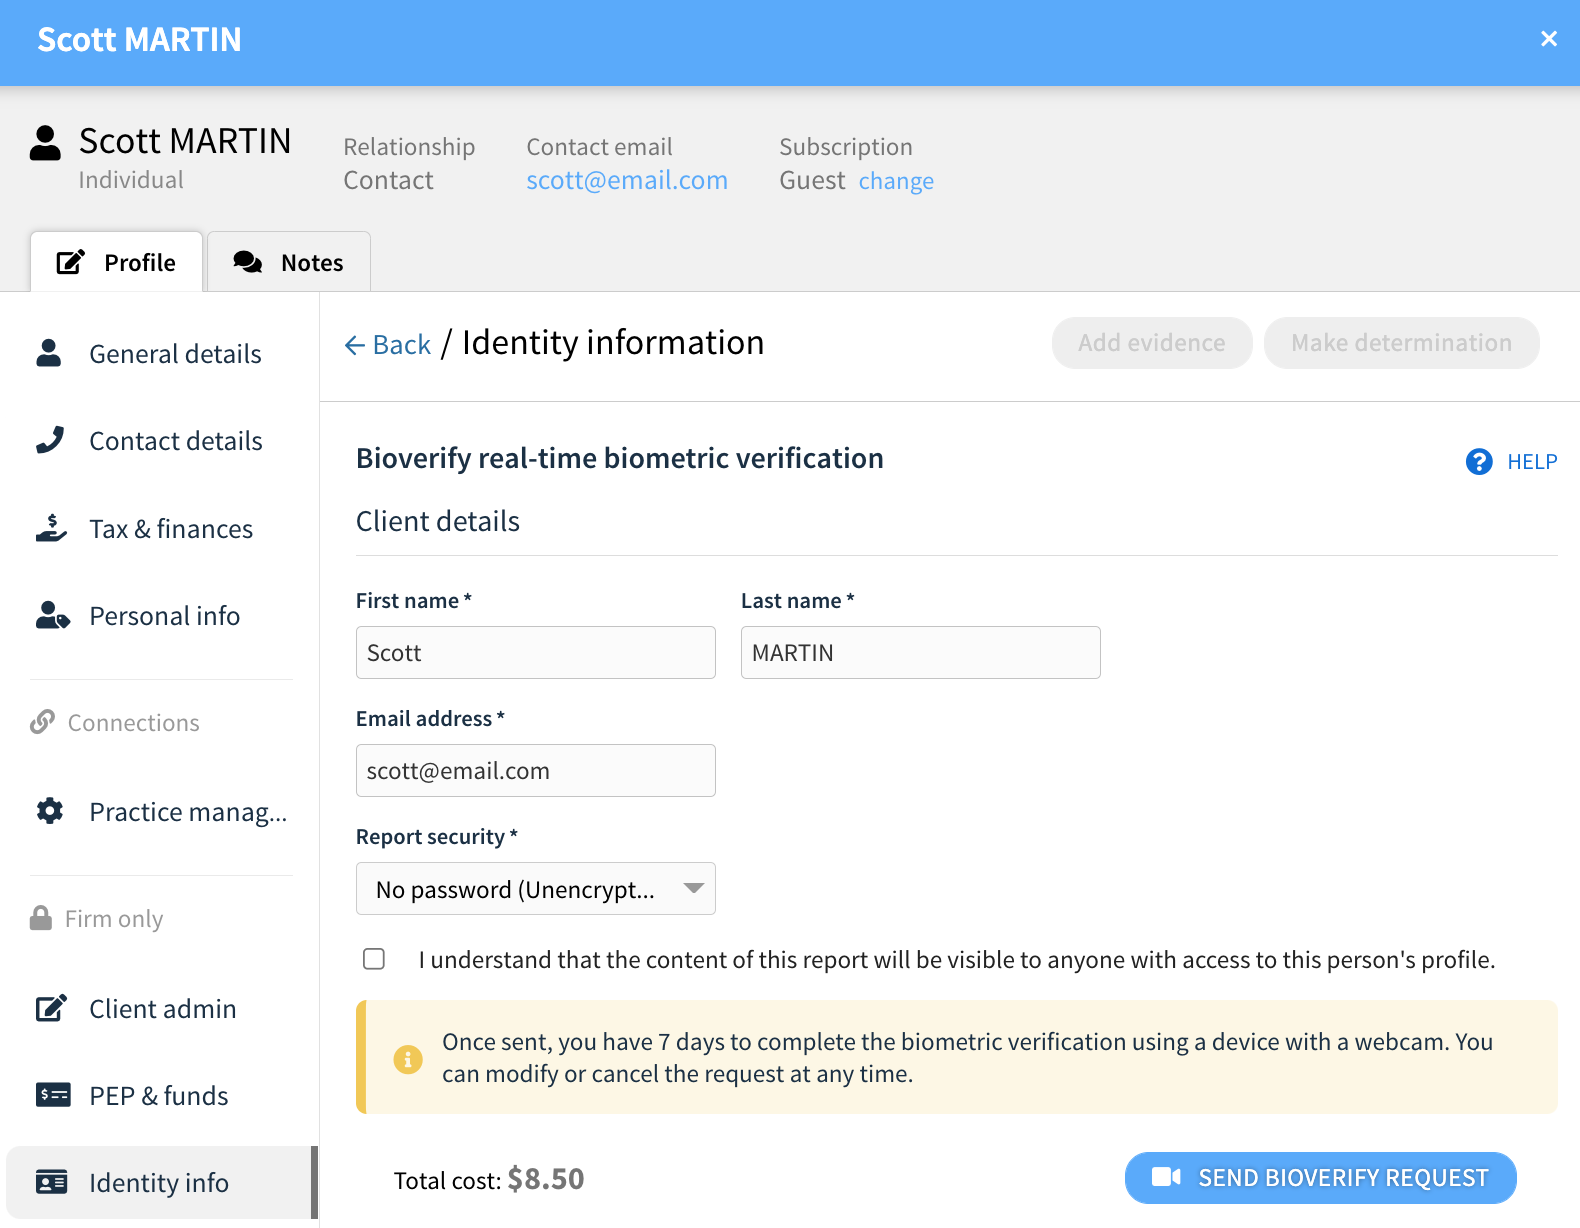
4. Complete all details in the Biometric request form - First name, surname and email address will auto-populate should the person already have this information in their Connectworks profile.
If you wish to have the report password protected, you can choose this option under the "report security" dropdown. (Please note you will be responsible for remembering the password set, as Connectworks are unable to retrieve or reset this.)
Once details are completed select 'Send BioVerify Request'.
5. At this point, the client will be emailed an invite link which they can use to complete the biometric check. (It's important to note here that the invite link is only valid for 7 days before it expires. The firm will be charged for the check whether it is completed or not.) If the check is not completed within the 7-day period, a new request will need to be sent and paid for.

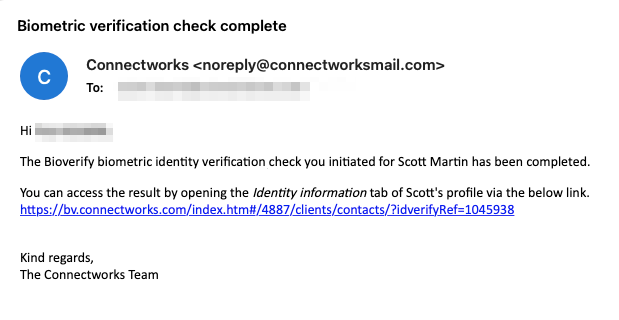
6. Once the biometric verification check has been completed by the client, the firm staff member who requested the check will receive an email to advise. The firm staff member is able to access the results by clicking on the link in the email - this will take them to the individual's profile, where they can access the identity information tab.
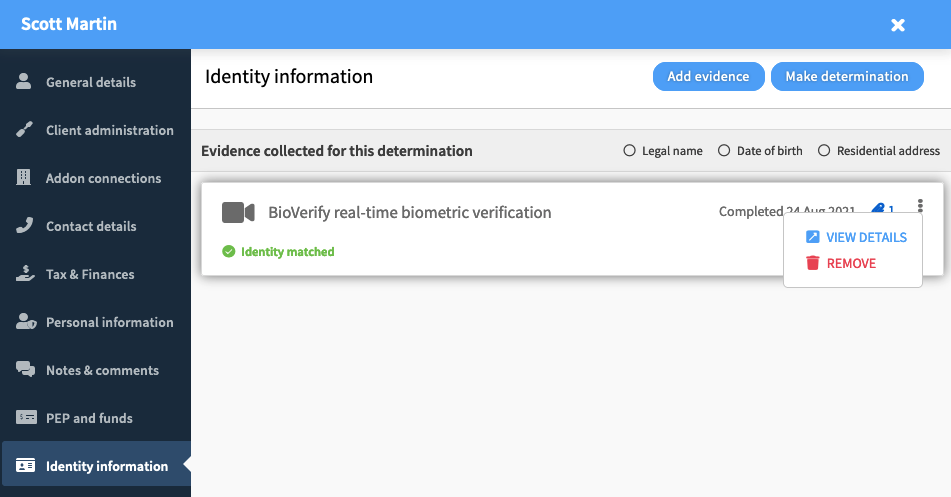
7. From the identity information tab, you are able to view the overall details of the check by clicking on the 3 dots > view details.
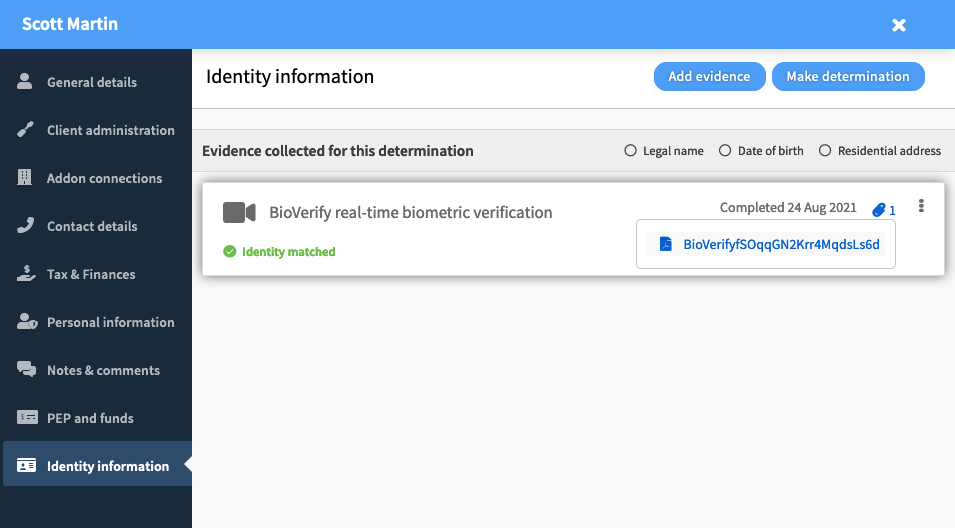
8. To access the full report, click on the attachment icon, and then on the file name. (If you requested the report to be password protected on the earlier screen, you will be prompted to enter this before the document will open).
For further information on interpreting biometric verification results, please refer to this link here.