Managing Share Classes
Creating and managing share classes in Connectworks
This article explains how to create and manage share classes. A share class is a group of shares that bestow the same set of rights on their holders. A company can have more than one class of shares with different sets of rights. A share class needs to be created before you’re able to issue shares from that class.
How to Create a Share Class
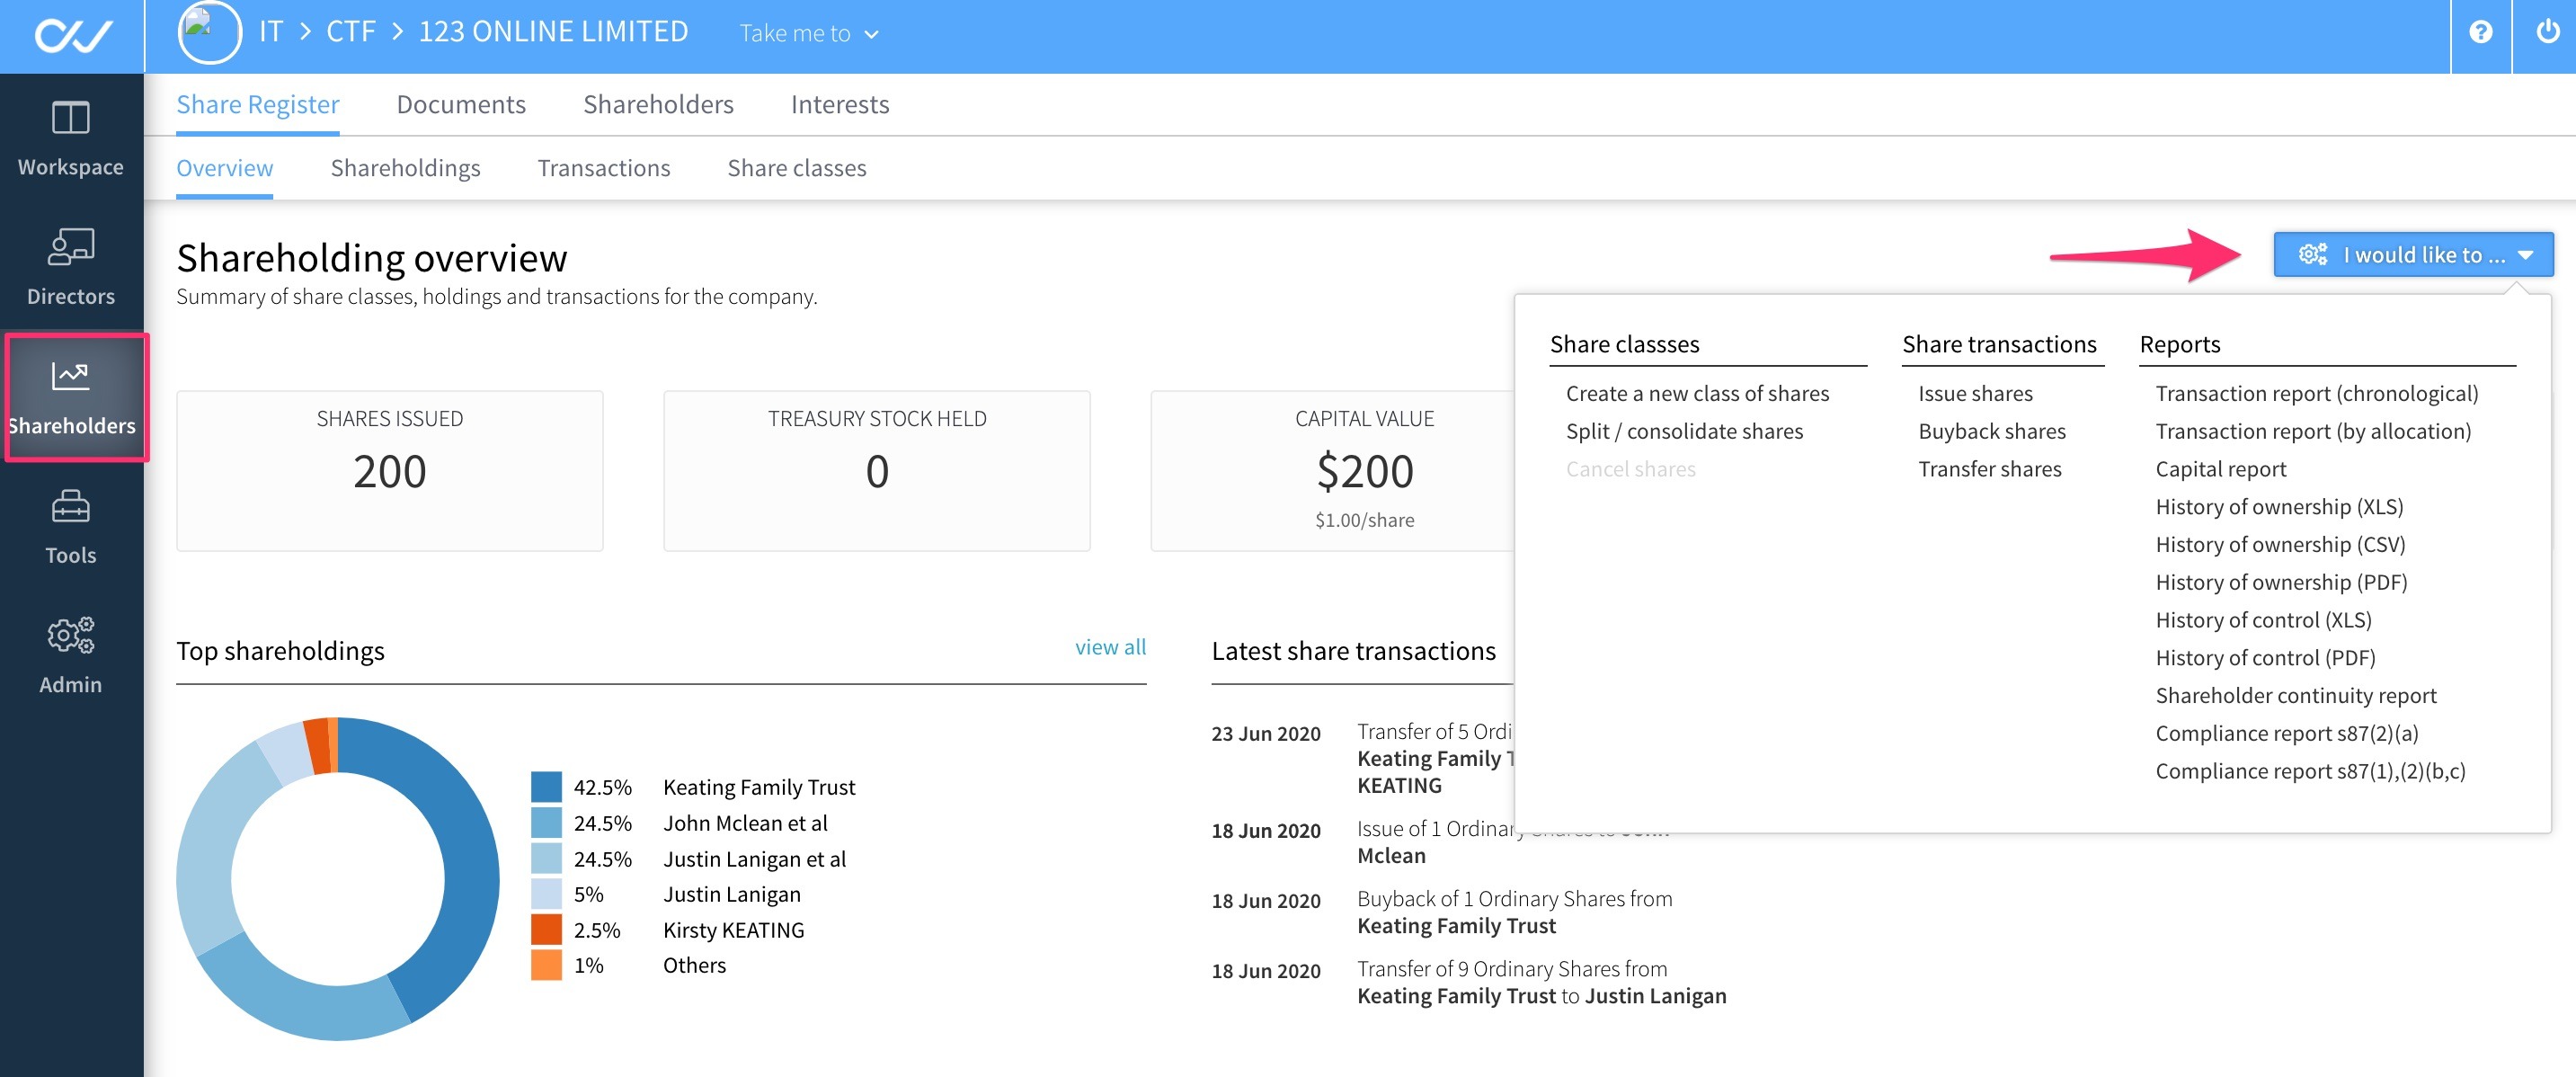
1. Navigate to the company's workspace, then to the Shareholders tab.
2. Select "I would like to..." then "Create a new class of shares".

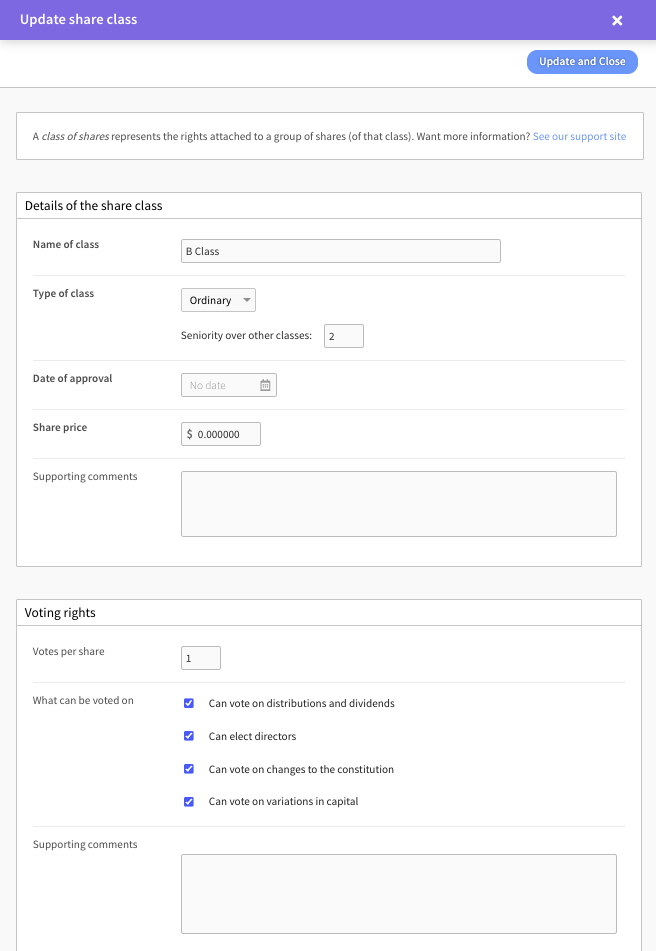
3. Complete the details on the Create class of shares form:
-
Name of class
-
Type of class - Select Ordinary, Preference or Other from the dropdown, and enter its seniority over other classes (ie. its rank/preference on liquidation - 1st, 2nd, 3rd etc...).
-
Date of Approval
-
Supporting comments
4. Complete the Voting rights form:
-
Votes per share
-
What can be voted on
-
Can vote on distributions and dividends
-
Can elect directors
-
Can vote on changes to the constitution
-
Can vote on variations in capital
-
Supporting comments
-
5. Restrictions - complete any details of restrictions that apply. These can be:
-
Restrictions on share transfers
-
Restrictions on general rights
-
Restrictions on dividends
-
Restrictions on distributions
-
Other restrictions
6. Preference - complete the preferences that apply:
-
Conversion preferences
-
Has conversion rights
-
Conversion ratio:
-
Supporting comments, notes or description of conversion rights (optional)
-
-
Liquidation preferences
-
Has liquidation preferences
-
Liquidation multiple:
-
Supporting comments, notes or description of liquidation rights (optional)
-
-
Participation rights
-
Has participation rights
-
Supporting comments, notes or description of participation rights (optional)
-
Has participation cap with multiple:
-
7. Select Create to save the class of shares. You can then select this share class when completing a share issue.
How to Edit Share Classes
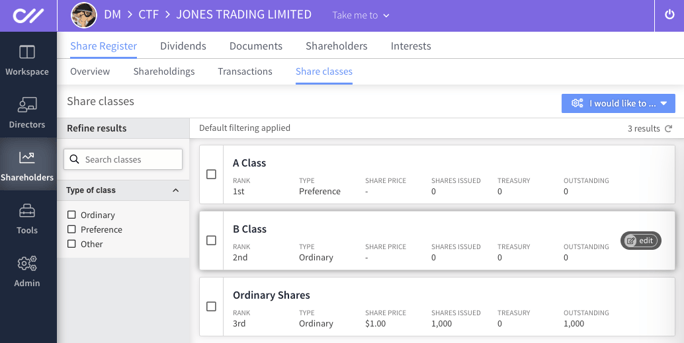
1. Navigate to the company's workspace, then to the Shareholders>Share Register>Share classes tab.

2. In the subsequent form, all details relating to the share class can be amended and then saved by selecting the Update button in the top right corner.

